Landing pages or squeeze pages are essential to any marketer’s toolkit. Landing pages are effective because they provide the visitor with a clear and direct call to action.
Sometimes a video landing page is better than a text only. With a short video, you can demonstrate your service, product or tell your story much better than text can.
Today’s tutorial shows you how to create an elegant, but minimalistic video landing page. The page is mobile friendly by being responsive and it is highly effective when implemented correctly.
The tutorial is below, includes a video and written tutorial. Then you’ll find links to all the different resources I use and the Youtube embed code for the landing page.
Questions or comments? Please leave them below in the comment section.
Creating a simple video landing page with a call to action.
The call to action can be to opt-in to sign up for your email list, or to send the visitor to another link. I show you both methods in this tutorial.
Video Tutorial
Text, step by step tutorial
First login to your Leadpages account and go to the templates section.
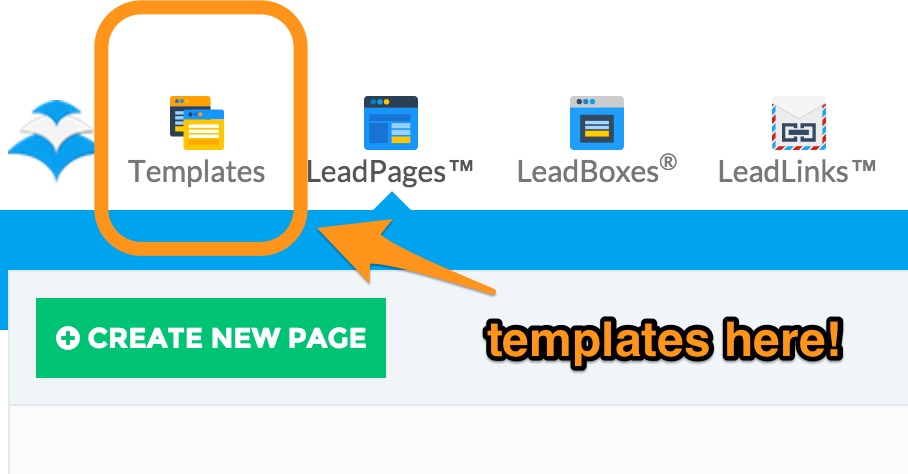
Find the templates on the top left hand side
In the Template section look for the template labeled: G+ Hangout Page (Doubles As A Sales Page or Opt-in Page). You could use a number of other templates available. There is one specific template called Video Landing Page. I wanted the two calls to action to be big buttons.
And I want the ability to find out which is a better landing page, one with the social media icons and one without it. In the future I would A/B test this feature.
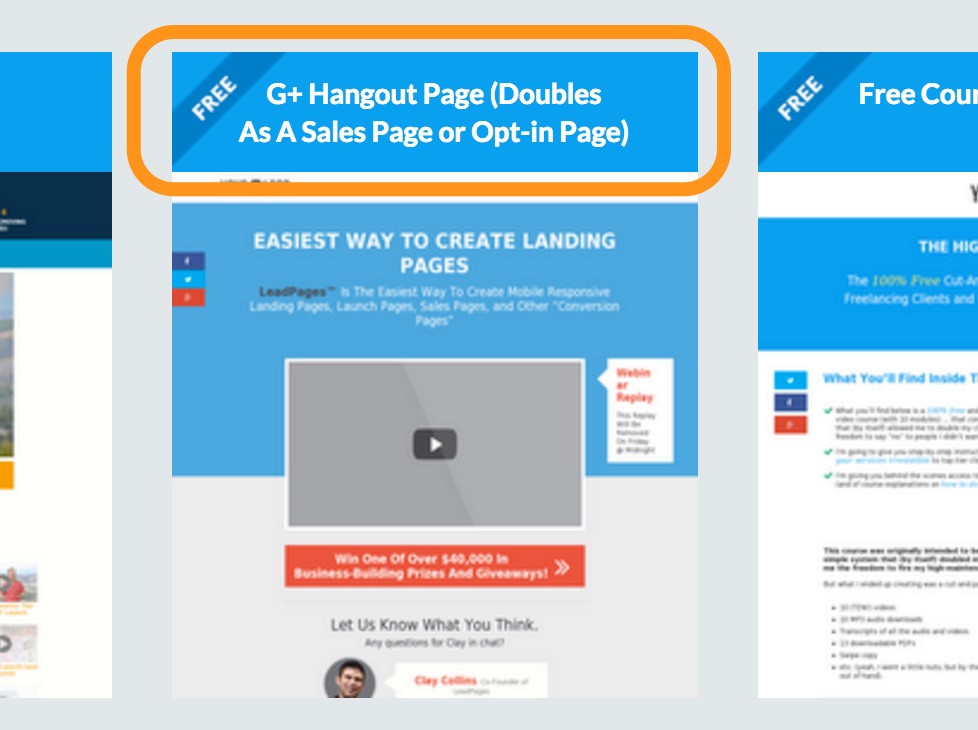
Scroll about 1/3 or 1/4 of the way down and look for this template.
For now, we want a simple video landing page. No fancy stuff, no social media, no thrills, no frills.
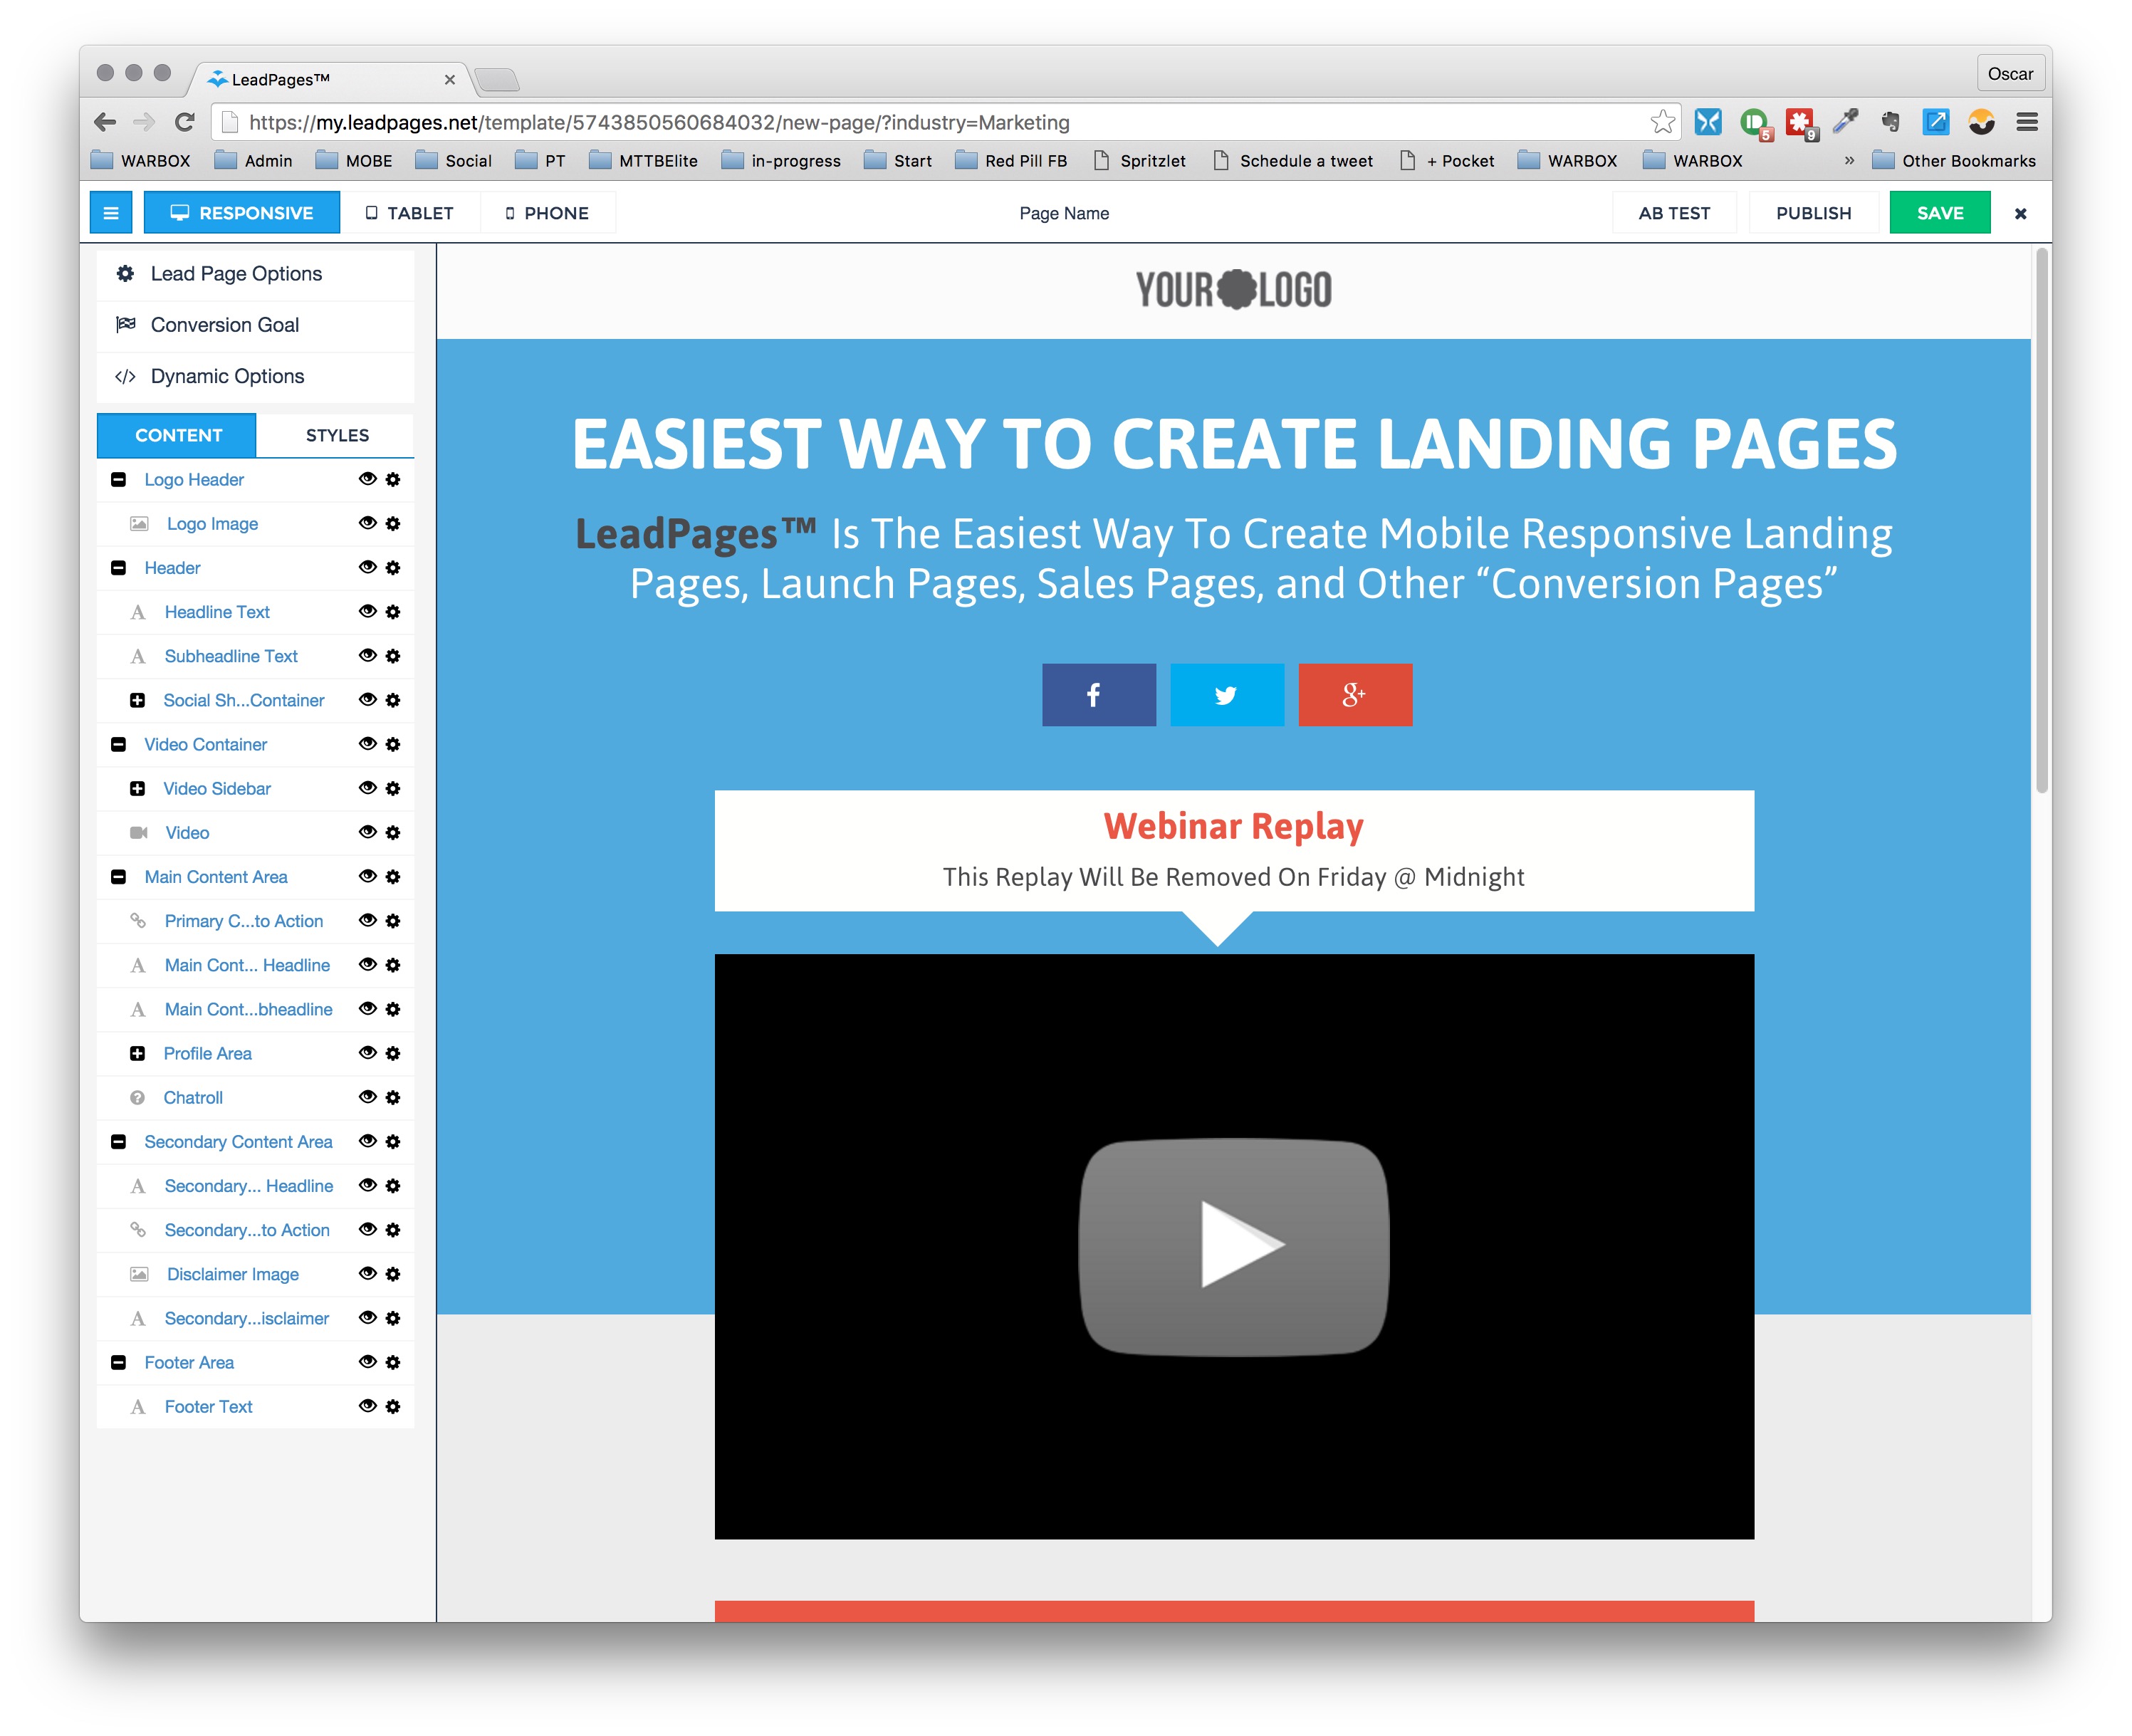
Once you select this template and go into edit it, you will notice it looks a whole lot different than the finished product that we want. This is what the original template looks like the screenshots below (click to enlarge).
The top of the template page looks like this.
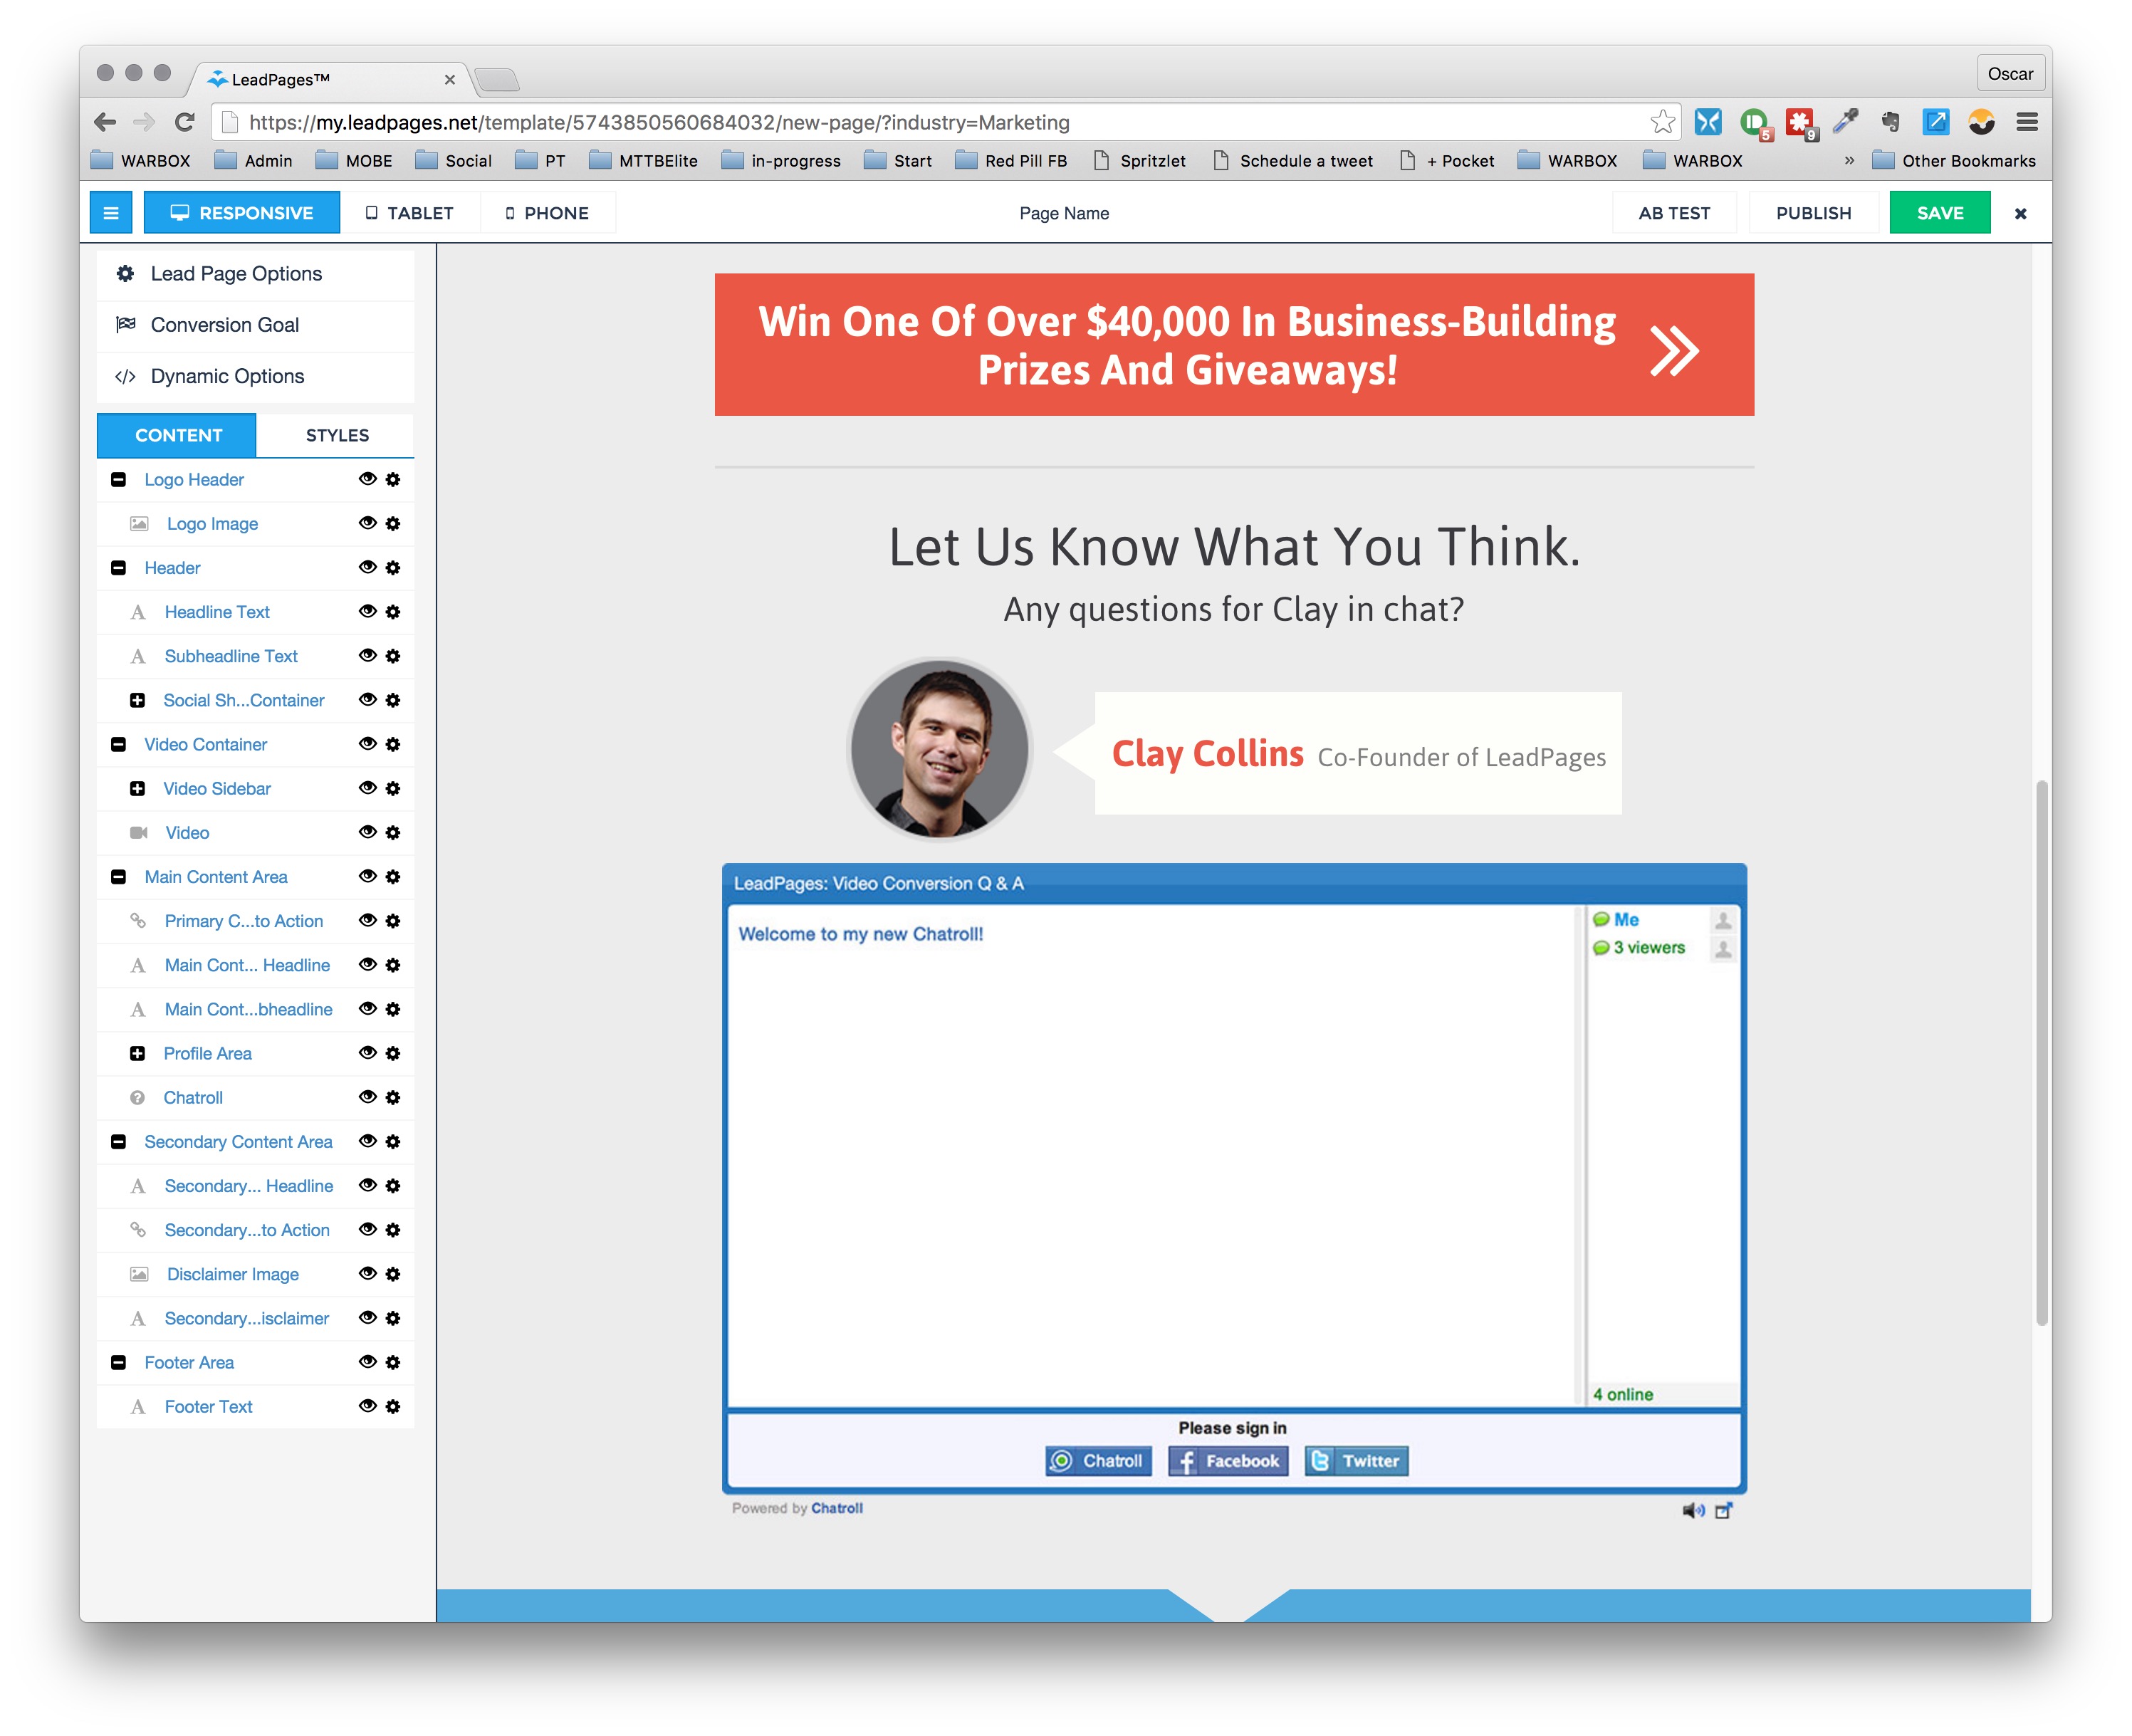
This is the middle of the template page.
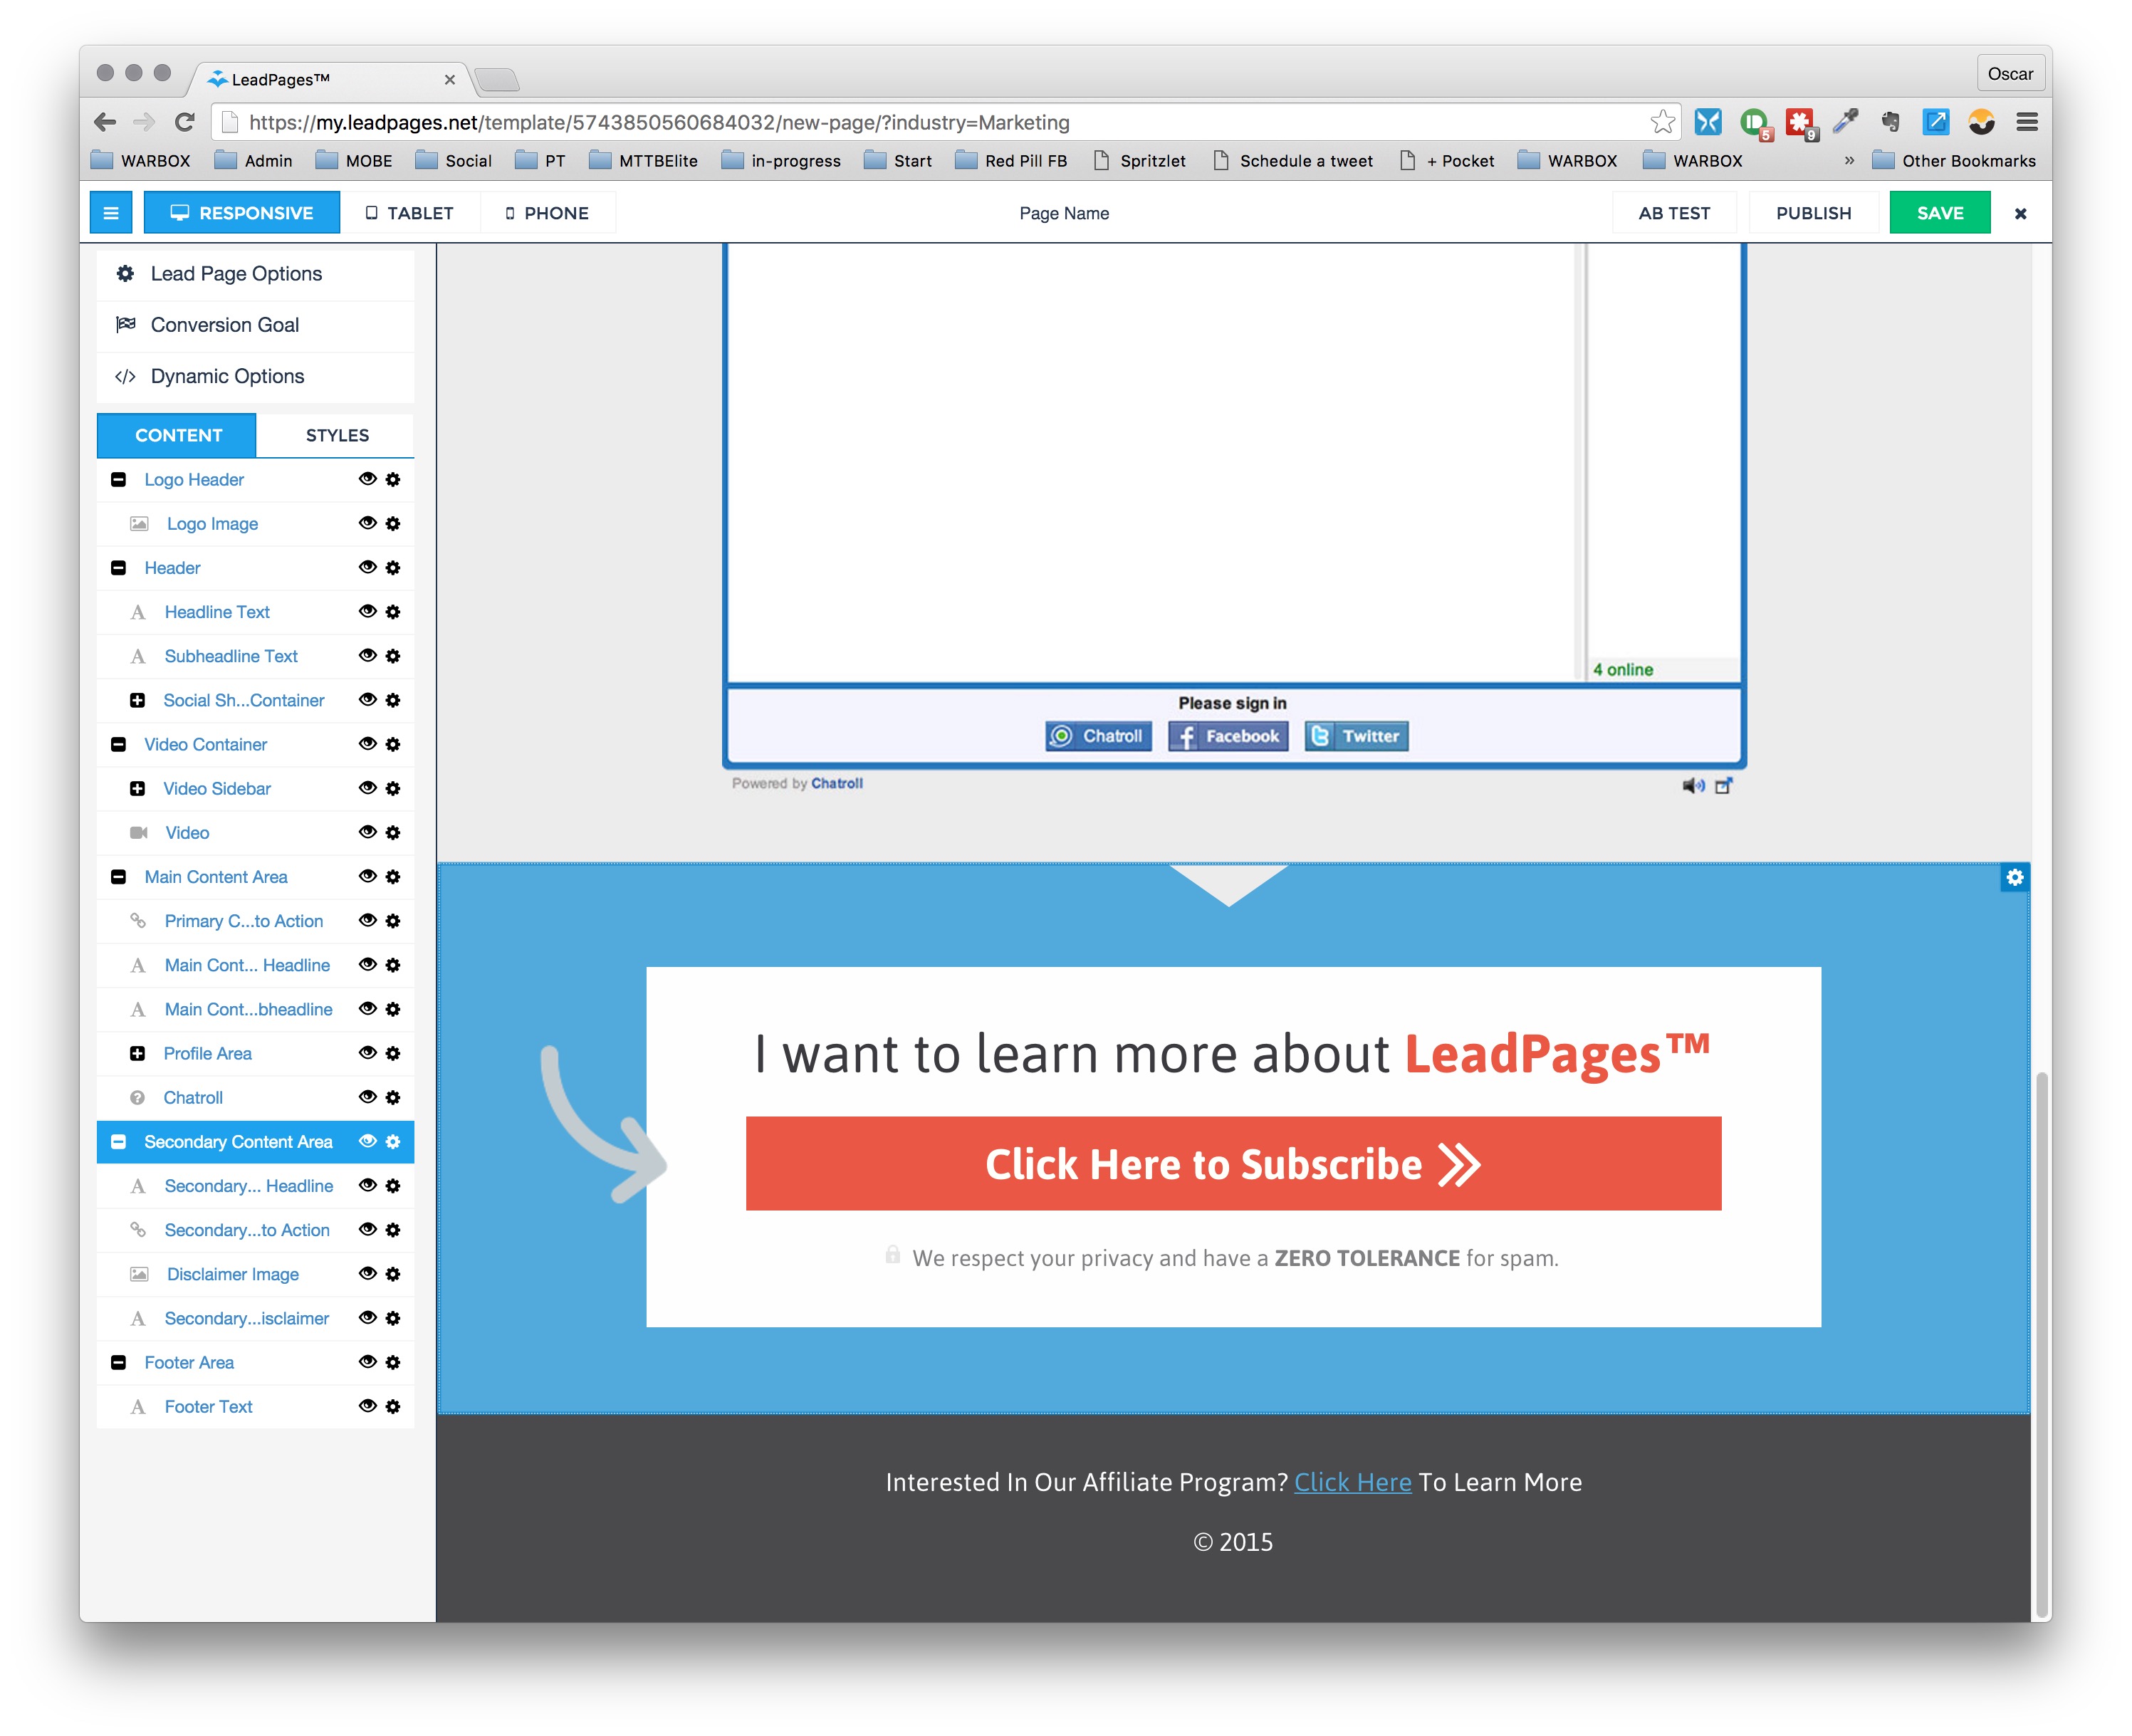
This is the bottom of the landing page.
What we really want is to make it look like this page here (opens in new window) the video will autoplay. That is simple and direct. There is a headline that pitches the offer, then a little bit of instruction. Then the video follows and it autoplays while showing the minimal number of distractions.
There are two large call to action buttons, one immediately after the video and one after the text box that follows the first call to action button.
Please note: For the sample landing page I showed you above, I just took one of my Youtube videos and made the page as an example for you. It’s just for demo purposes.
Why so simple?
If you want your visitor to take action on your landing page, then the page needs to be clean, organized and it needs to have a clear and single purpose. That’s why I created it so simple.
To clean up the template so it looks like my sample, you just need to go through the elements we don’t want on the left hand side. You can use the “eye” icon to remove them.
In my example, I removed a lot of elements from the page starting with the top logo, most of the middle box stuff and a few other things. Here’s what the list of elements looks like on that page.
Notice the highlighted green box shows the eye-icon when it is active so the element which it indicates is visible and the red box indicates what the icon looks like when it is hiding an element.
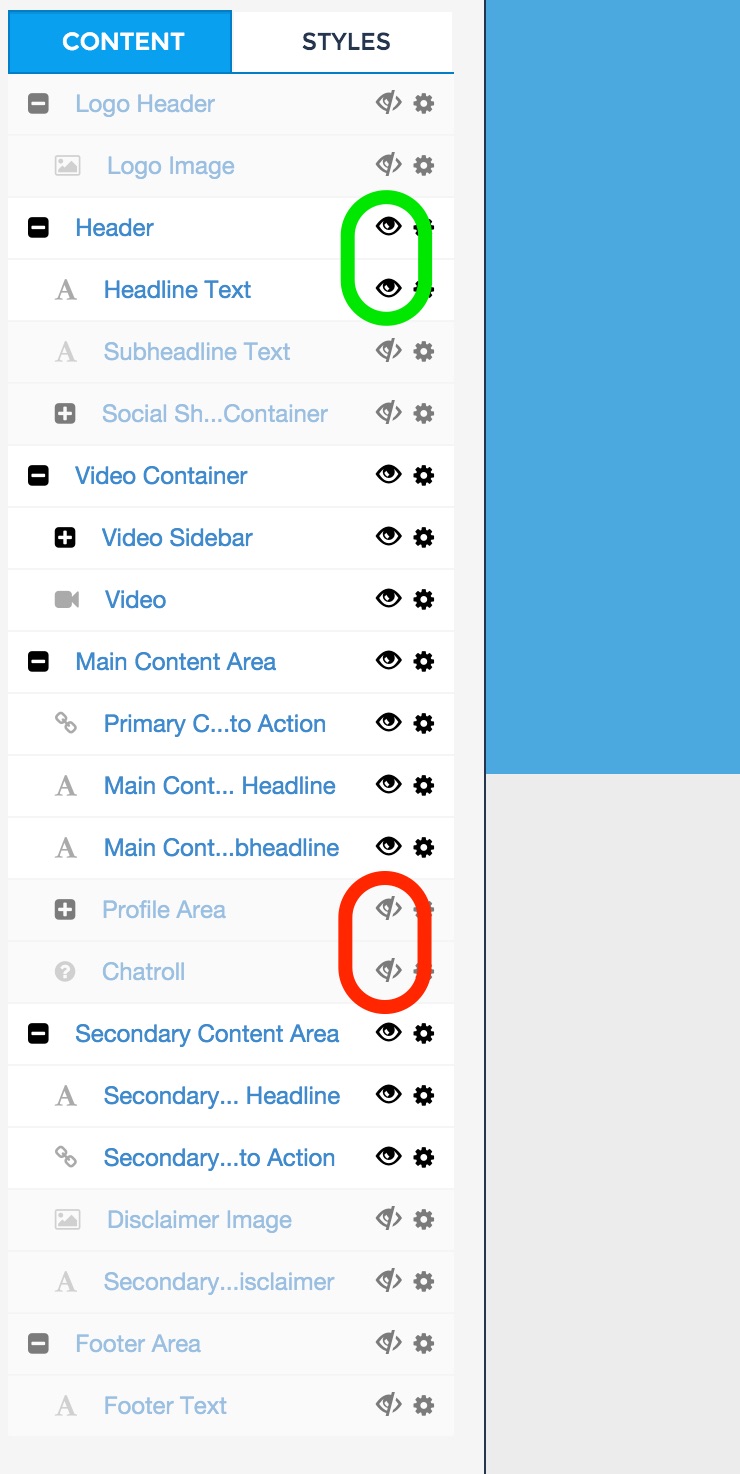
All the elements start in visible mode, here are all the ones I hid to achieve the desired page.
Adjusting the call to action
Once you get it to look clean, the way I show in my sample, you need to adjust the call to action. In some cases, you will leave the call to action connected to an opt-in form where the visitor enters their name and email and they get added to your Aweber email list. But what if you don’t want to do that?
In some cases you want the call to action to be a simple link to another page. To do this you just need to adjust the settings for the call to action. Mouse over the button and a small cogwheel will appear on the top right hand corner of the button.
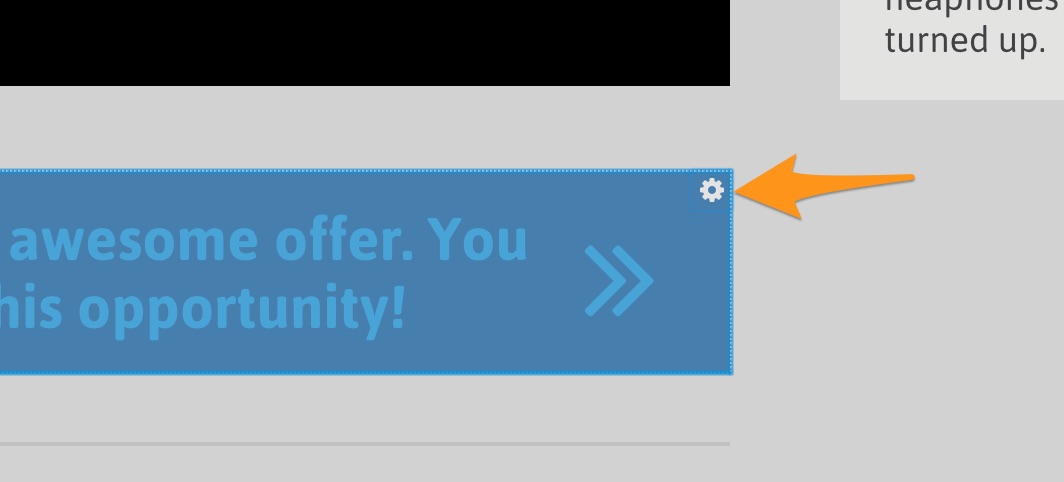
Mouse over the button and this settings button appears.
When you click on that, you will see a the “link options” action menu, click on it.
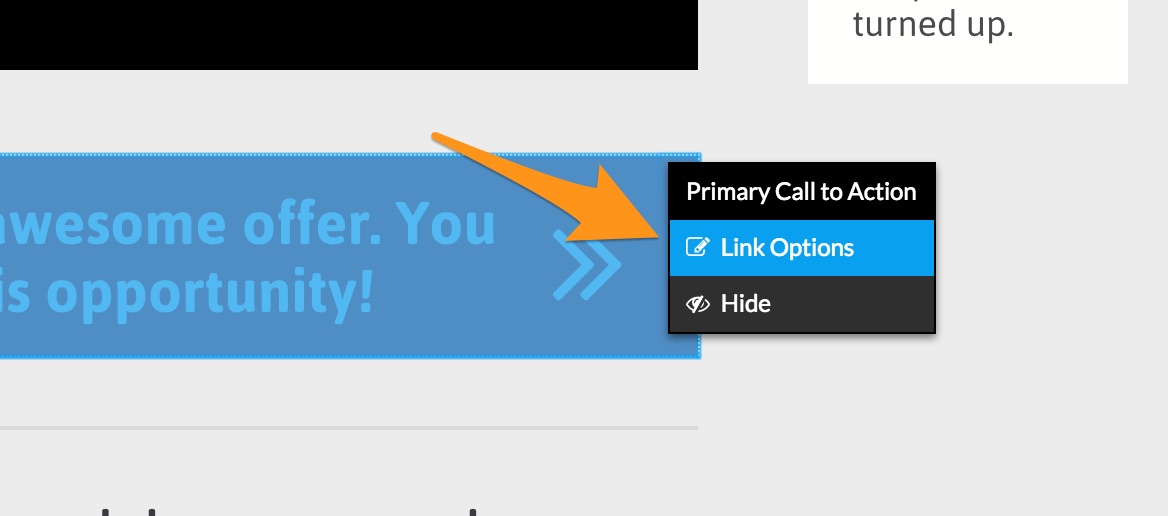
This has the options for the button when you click on it.
Then you simply change the option from “Show Opt-in Form” to “Go to a URL.” Enter the URL under the Target URL field.
Fill in the Text for the button or link and whether you want the link to open in a new tab, or use the nofollow option.
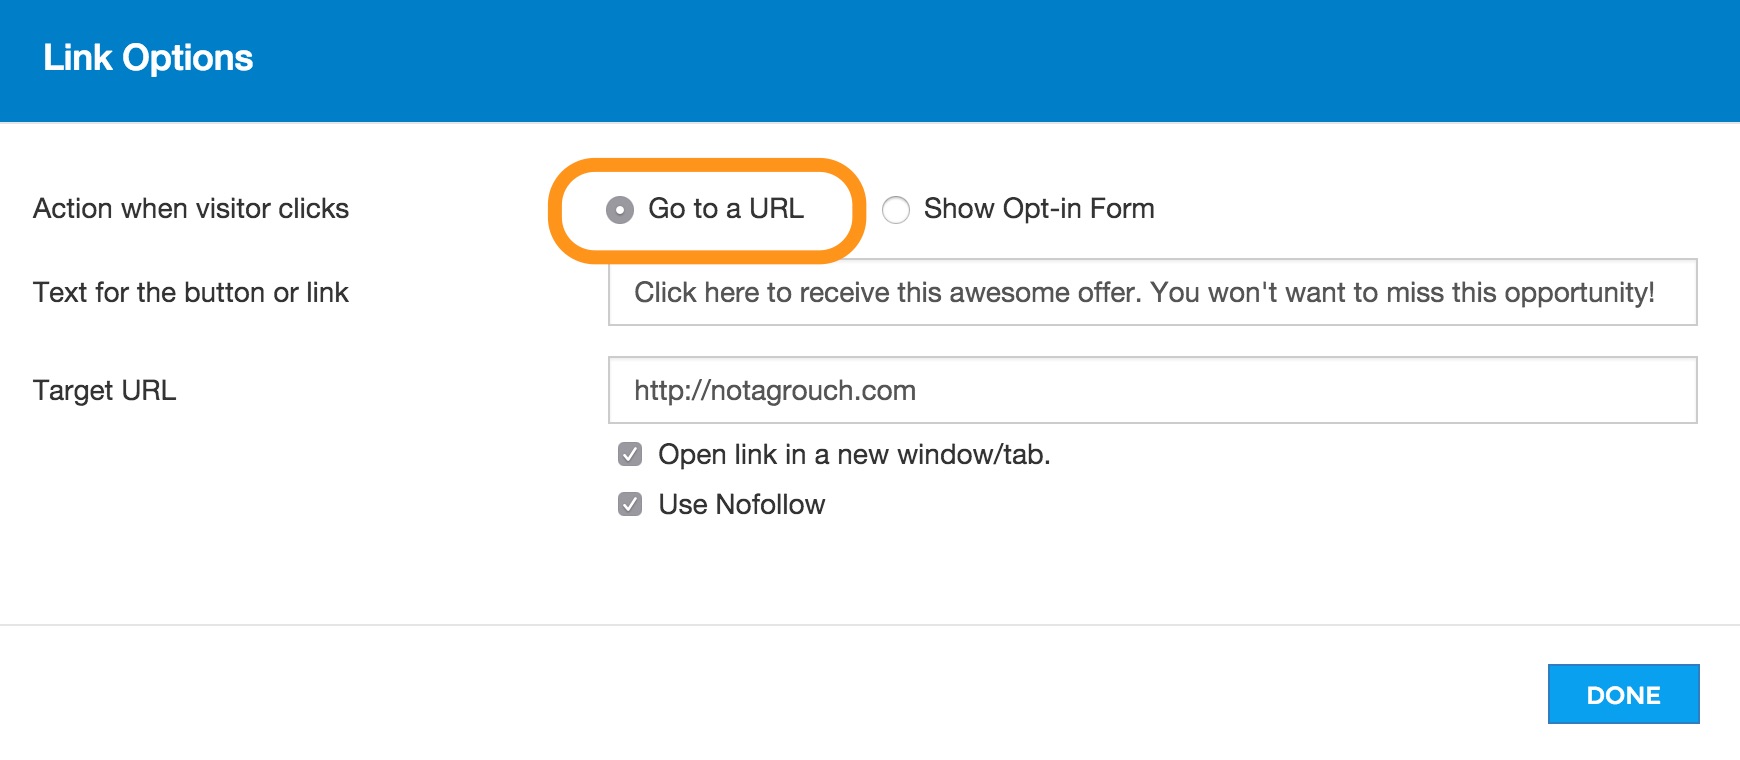
The default is Show Opt-In form if you want to connect it to Aweber.
Click on done. Save the page and publish it, and you’re ready to go. You can then use direct link from Leadpages to plug into your traffic source (ad, solo ad, social media). Or like I showed you in the example above, you can connect it to your WordPress website using the Leadpages plugin for WordPress.
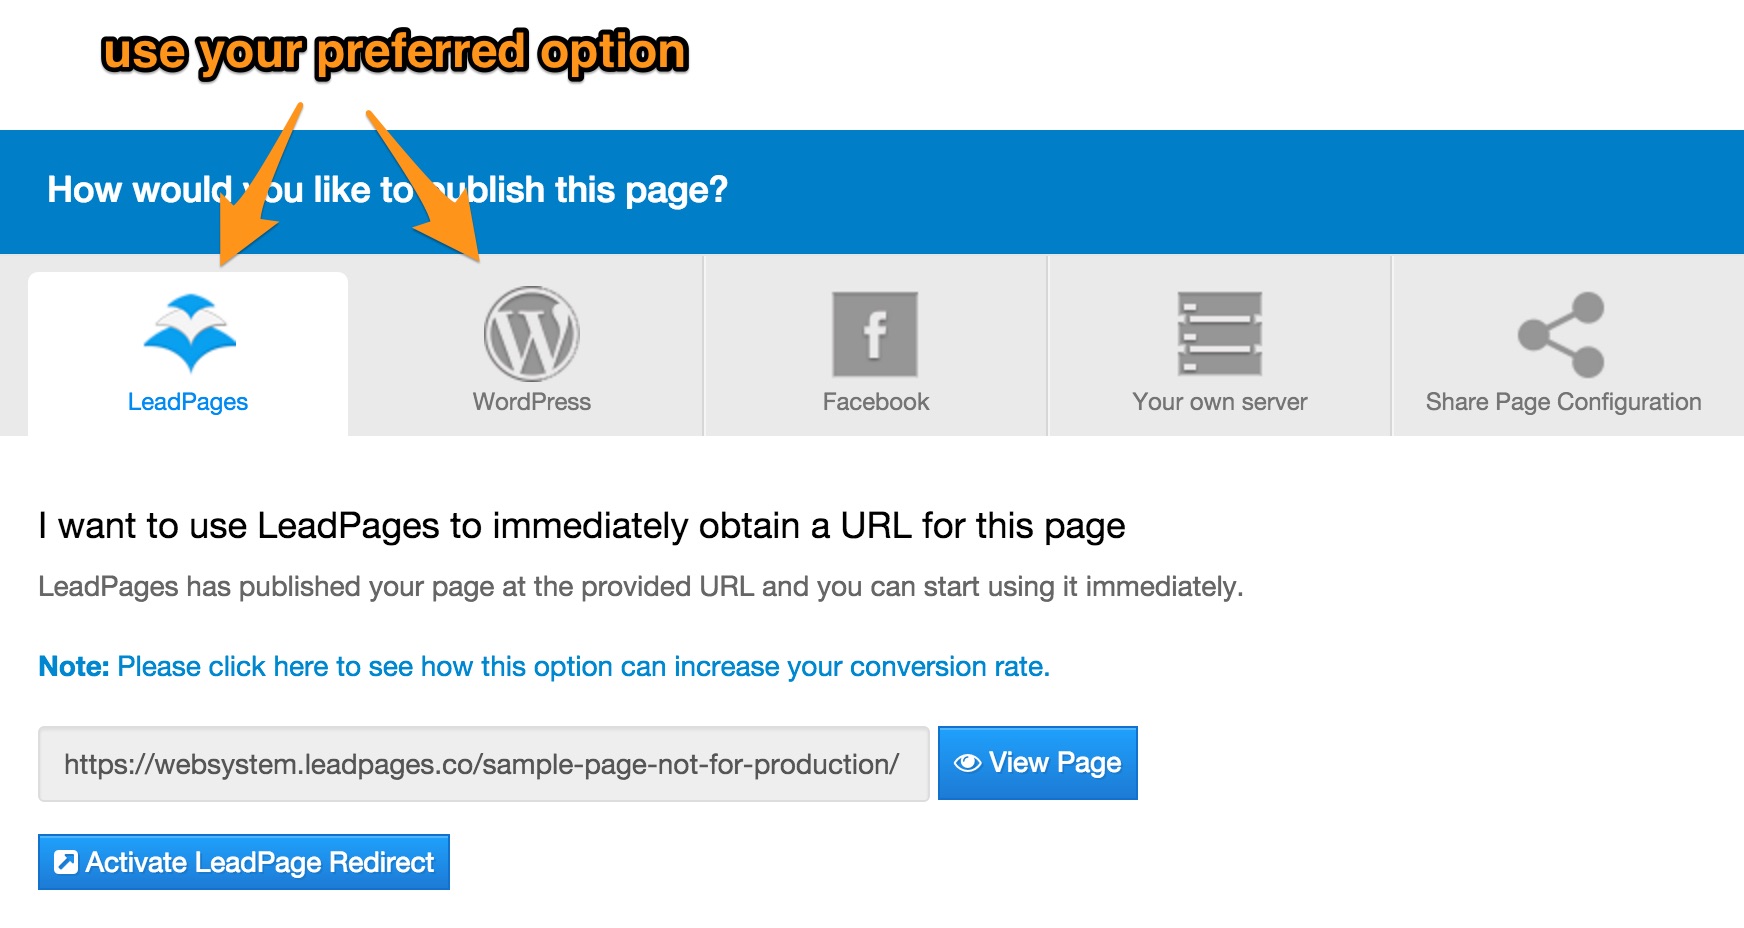
Once it is ready, you can publish your landing page directly via the link or connect it to WordPress.
I use three tools to get this video landing page done
Leadpages. Get your account at Leadpages setup here (affiliate link). I have the Pro level account because I like to do A/B split testing. I recommend you get that as well.
Aweber. My go to email list service. They recently revamped their entire operation and I really like them. You can get started for free for the first month (affiliate link).
Youtube. You should have an account there already but if you don’t, go get one. Every internet marketer needs at least one youtube account. You could also use Vimeo, but I don’t cover that in this tutorial.
If you don’t have a Youtube account, here is a video explaining how to get a Youtube account.
Youtube Embed Code for Leadpages
If you’re looking for the code to use on your own landing page, this is the code I used for my Youtube embed video on the tutorial. I use some of the options that the youtube player provides.
If you copy and paste this, don’t forget to change the video id code so it works for your video, I explain that in the video tutorial.
<iframe width="857" height="482" src="//www.youtube.com/embed/kecoShfR1Nc?controls=0&showinfo=0&rel=0&autoplay=1&autohide=1" frameborder="0" allowfullscreen></iframe>
Youtube embed code documentation
For a full list of the parameters you can use on a Youtube embed video, you can review the official documentation here.
Youtube embed codes have 2 main parts. One is the address of the youtube video and the other is the parameters instructing Youtube how to play the video. These parameters work with values, like this: parameter_name=value.
With these commands, you can hide most of the player controls, autoplay, loop the video, etc. In my code example above, I use a few different parameters to customize the youtube video. Let me explain them:
controls=0 – This means that the play / pause controls will not be shown
showinfo=0 – This means that the video will not show all the details about the video as Youtube normally does
rel=0 – This means that when the video finishes, it will not show related videos like Youtube does normally
autoplay=1 – This instructs the page to automatically start playing the video. Please notice that autoplay does not work on most mobile devices.
autohide=1 – This means that all the stuff that is shown when you hover your cursor over the video will disappear when you move your mouse away.
Wrapping things up
This is just one method of creating a video landing page. Keep in mind that a good video is important as well as a good pitch. You can have the best looking, fastest loading, simplest page in the world but if your ad copy sucks or your video is not good, you will not convert traffic into sales.
Do you have any questions or comments? Let me know below.