How Add Your Profile Picture to Comments with Gravatar
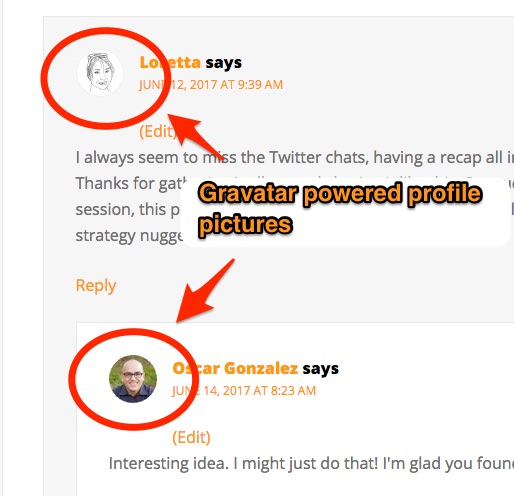
Have you ever noticed some people's profile picture in some blogs is just a silhouette? This happens in blogs, and you'll see it on the comments. Sometimes you'll see a "monster" or a big "G" in place of a profile picture.
If you have just jumped into blogging with a WordPress blog, this is something I tell everyone I help start a blog, maybe it will be useful for you as well. So, I advise you, get a Gravatar account.
What is Gravatar and why use it?
This post will cover a quick overview of what Gravatar is and why you should use it, and basic direction on how to create a gravatar account. You should register a profile at
You should register a profile at gravatar.com -- This is one of the services online that associates your email with a picture whenever you leave comments on any gravatar-powered websites.
Most blogs have gravatar-enabled comments and this helps you keep a consistent brand image even as you leave comments on other blogs.
Sometimes the Gravatar image will be used on your own blog too. For example, when you respond to a comment on your own blog, most themes use the gravatar image associated with that email address. You'll see the photo next to the comment.

When you first setup a WordPress blog and you have an email address that isn't registered with Gravatar yet, then you will see just a silhouette as your profile photo if you respond to comments.
After you create a profile in Gravatar, that picture will change to whatever picture you associate in your profile. That way, when you leave a comment anywhere, your picture will also be updated everywhere you've left comments or whenever your gravatar profile picture is used.
You can add multiple email addresses to your Gravatar account so you can maintain a personal photo for your author profile, but you could have a different one for your business if you want to have different branding.
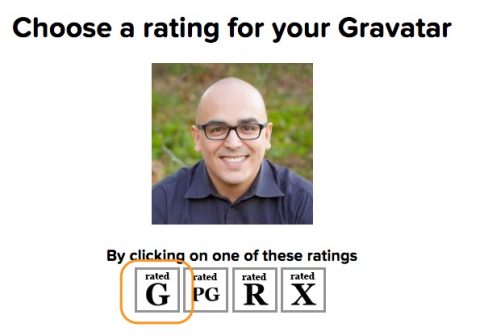
Each email address can have one picture associated with it, and each photo has a self-managed rating level. This is useful if you're posting in communities that distinguish different types of participants based on this rating.
This is not an extensive tutorial, instead, it's just a basic guide on a few things you need to know about Gravatar and WordPress.com. Setting up each of the accounts is very self-explanatory so I didn't think it would be necessary to have a step by step tutorial.

Jumping Through WordPress.com Hoops
In the process of getting a gravatar account you'll need to create a WordPress.com account, when you create a WordPress.com account you'll be asked to "name your blog or website."
If you already have a self-hosted WordPress.org website, or I set up your blog for free, you can create a matching wordpress.com blog. You just need to pick a matching name. Most likely you will not be using this blog for anything other than to provide you access to some of the services available for WordPress.com websites.
The name you select here will result in a blog named like this: yourname.wordpress.com.
After you get your WordPress.com account, In your regular WordPress' blog dashboard, you will be able to install the Jetpack plugin and connect that to WordPress.com to take advantage of some of the free modules like "WordPress.com stats" and "Contact forms" in addition to Gravatar.
Back to Gravatar
Once you have your WordPress.com account, you can go into Gravatar and log in with your WordPress.com credentials and complete your profile. So long as you use the email address that is registered with your blog account or whenever you leave comments, your picture will show up next to that. I wrote a quick guide about Gravatar a while ago as well. That tutorial probably needs freshening up a bit, but I still recommend and consider Gravatar a must-have service.
You can also enter some basic information about yourself so people can see a quick bio when the Gravatar image supports hovercards. We'll cover hovercards and some of the other services available with your WordPress.com account later on.

Conclusion
This post suggests and encourages you to get a Gravatar profile configured and then associate your email address with a picture so this picture shows up whenever it is supported, like some sections on your self-hosted WordPress blog and comments throughout the web. Gravatar requires a WordPress.com account so you'll need that, but you get access to other additional services as well so I recommend you get it all configured shortly after you get your first WordPress blog.
Bonus tip: In addition to Gravatar, I suggest you get a profile set up and completed in other major networks like Disqus.com, Blogspot, Tumblr, Medium, and probably your favorite niche related blogging communities


